Deutsch | English | Español | Français | Italiano | Português | Русский | العربية | 日本語 | 简体中文 | 繁體中文 | 한국의 | Türk | Polski
LOGO
B2B Web Portal para Máquinas-herramienta, Metalúrgica Industria
Producto / Servicio Proveedores Catálogo y literatura    
Buscar
or
home Product News Catalogs Web TV News & Topics Featured Articles Trade Shows Sourcing Help My allmetalworking
Contenido del producto Noticias
allmetalworking > Contenido del producto Noticias > Integrated measurement for automated manufacturing
  
Share |
Integrated measurement for automated manufacturing

CAD, integrated measurement, automated manufacturing

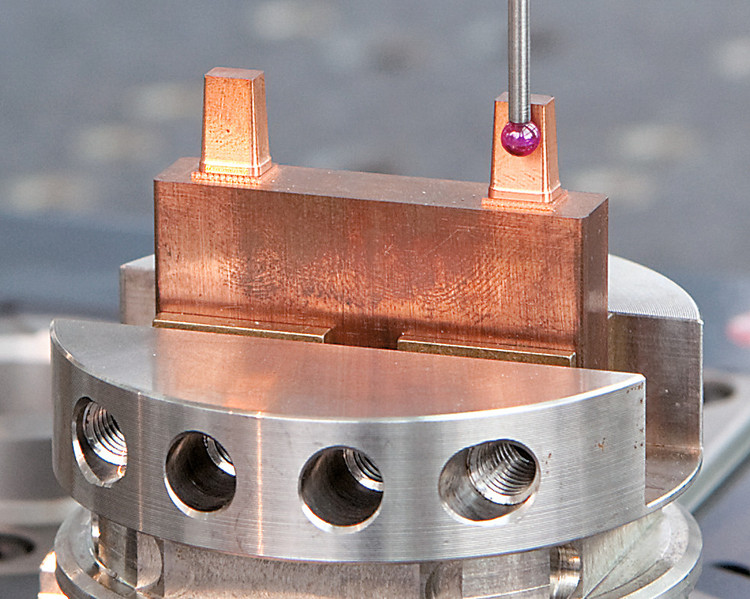
Erowa asks: How many electrodes are measured before they are released for EDM? The answer is all of them, which places high demands on measurement.

The company explained that traceability in production, rigorous quality demands, a large number of measurements and automation of processes all demand new paths be taken in the manufacturing process. This is where the company’s Q-Measure comes in. The CAD software plugin lets operators quickly and easily specify the properties for the measurements with a familiar CAD system user interface, Erowa said.

With the plug-in, measuring points and tolerances are said to be defined. The simulation then indicates whether any collision points exist, and, if not, the process continues. The JMS-pro process control system then assigns all data for the subsequent measurement automatically to the proper electrode.


According to the supplier, after the electrode has been manufactured, a robot that is part of the automated production process sets it up on the measuring machine. The electrode is then identified by means of the integrated chip located in the electrode holder.

Q-Measure is then used to generate the appropriate measuring program, after which the quality measurement is started. This also explains how automation works properly even for a lot size of one. The measuring process step is handled the same as any other kind of processing, the manufacturer explained.

After measurement, the data is evaluated in two ways: First, the release or blockage of the next steps is initiated automatically. The predefined tolerances form the basis of decision for the system. Second, an event log is generated automatically. This shows both graphically and numerically the measuring results and their relationship to the specifications. The log is generated as PDF and saved with the job.

For more sophisticated shapes, the 3D feature displays exactly where the points are located. The generated graphics can be freely rotated and turned on any PC on which Acrobat Reader is installed.

Etiquetas:
 
Acerca de esta empresa:
EROWA has been following a straightforward corporate policy ever since it was established. Starting out as a small business in tool and mold making, we have meanwhile become a globally operating organization for the development, production, consultation and distribution of modern manufacturing technology. 
Empresa:
Nombre de la empresa: Erowa AG
dirección: Knutwilerstrase 3
ciudad: Buron
provincia:
ZIP: 6233
país: Switzerland
número de teléfono: +41-41-9351111
FAX: +41-41-9351213
 
Nota: Las marcas, nombres de producto, el número de productos mencionados en este contexto, los derechos de autor pertenecen a la empresa.
 
Noticias de productos

2013-04-19

Spindle adapter provides for quick changeovers
Productos Noticias relacionadas

2014-07-04

Modular System Combines Machining Processes

2014-05-25

Heavy Duty CNC Lathe from Ganesh Machinery

2014-05-25

Kasto's new KASTOwin bandsaw is a win-win on both price and performance

2014-05-25

New Toyoda FH800SX-i environmentally friendly machining centre

2014-05-24

Multi-spindle machines for cubic machining

2014-05-24

Horizontal Machining Center available with 30,000rpm Spindle

2014-05-23

Hurco Introduced Horizontal Boring Mill

2014-05-22

New design probe head delivers the advantage of a high degree of indexable positions and very high rotational torque.

2014-05-18

Double column machining center machines all five sides of a part from a single set-up

2014-05-13

F650VM developed to offer premium performance at an affordable price
Páginas destacadas
5 Axis Machining CenterAir ToolsAutomatic Cold Drawing MachineAutomatic Feeding Equipment
Automatic Tool ChangerBall BearingsBallscrewBearings
Boring and Milling MachineCasting Base for Machine ToolChip ConveyerCircular Sawing Maching
CNC EDMCNC LatheCNC Machine Center SpindlesCNC Rotary Table
CNC Surface GrinderCooling EquipmentDie Casting End Mill
Forged PartsGear ReducerGearboxGrinding Center
Hoist and ChainHorizontal Machining CenterHydraulic PressIndex Drive
Index TableIndustrial RobotInjection MoldsJawed Chuck
Linear GuidewayLubrication SystemMachine Guard SystemMetal Band Saw
Metal Cutting ToolsMetal Stamping PartsPipe & Tube BenderPower Press
Precision Machining ServiceRobot Tool ChangerServo MotorsSpindles
Telescopic CoversTool HolderTool Storage MagazineTurning Center
Vacuum PumpsVertical Machining CenterWelding Machines 
contenido
· Home
· Noticias de Productos
· Catálogo
· Web TV
· Noticias y temas
· características artículos
· Ferias
· de Sourcing ayudar
· My Allmetalworking
Edición Especial
· directorio
· Comercio Suplemento Mostrar
2014 Hannover
Allmetalworking.com
· sobre
· Promover su negocio
· anunciar
· Asociarse con nosotros
· Comunicado de Prensa
· contáctenos
· Términos de Uso
· Política de privacidad
· Program Starter
· Mapa del sitio
B2B Portal Web Alliance
· Allitwares.com
· Allmetalworking.com
· Allbiomedical.com
· Allautowares.com
Buy Engineer Sample Kits
OEM Sourcing
idioma
· Deutsch
· English
· Español
· Français
· Italiano
· Português
· Русский
· العربية
· 日本語
· 简体中文
· 繁體中文
· 한국의
· Türk
· Polski


Derechos de los derechos de autor 2012 Allitwares Corporation Todos reservados. www.allmetalworking.com es una división de Allitwares Corporación
www.allmetalworking.com es un Portal B2B Comercio | Web Portal B2B | B2B del mercado en línea para Máquinas-herramienta, Metalúrgica Industria